- Connect Revel iPad POS
- Connect Clover POS
- Connect LightSpeed POS
- Revel Shopify - Creating New Products in Shopify from Revel
- Sync Inventory Updates and Create Products from Clover POS in WooCommerce by Kosmos eSync
- eSync Activity Log - List of Common HTTP Status Codes
- Revel and WooCommerce - Creating New Products in WooCommerce
- WooCommerce eSync - Troubleshooting Tips
- Connect POS and ERP to eCommerce
- LightSpeed Shopify - Creating New Products in Shopify by Kosmos eSync
Send Shopify orders to Clover POS
Create Shopify orders in your Clover POS - Two Way Inventory Sync.
To send Shopify orders to your Clover POS you will need to configure three Actions and then add all three Actions together into a single Task. The Task is used to RUN actions in your task on demand or to schedule your Actions via a 5 minute or greater interval. Once the order is inserted into Clover the Action to Adjust Stock for Matching orders in Clover will then update your Clover inventory for the Shopify order and line items.
See Video Overview - Sync Shopify Orders to Clover and Update Inventory - Two Way Inventory Sync
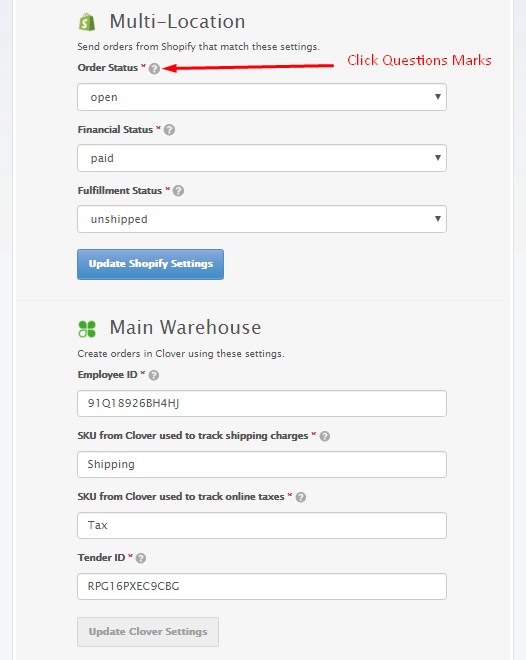
Configure Each Action
Click the Question Marks to learn how to configure your Action.
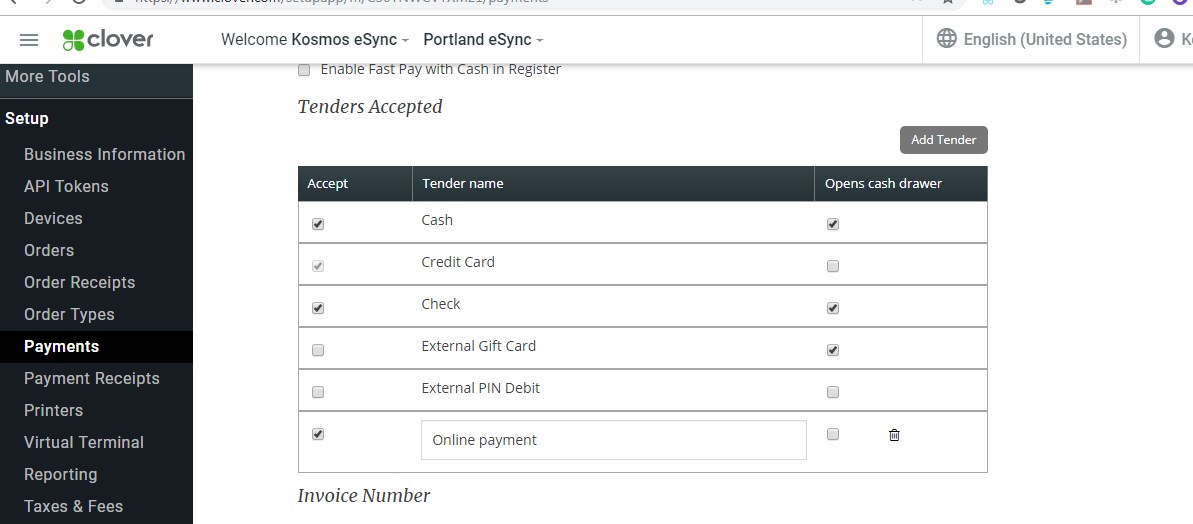
Adding a new or ‘Online Payment’ type.
- Login to your Clover Web Portal, select Setup in the left menu, and click Payments
- Select the Add tender button
- In the new field enter Online payment for the tender name, make sure the Accepted check box is selected, and scroll down to click the Save button at the bottom of the screen.
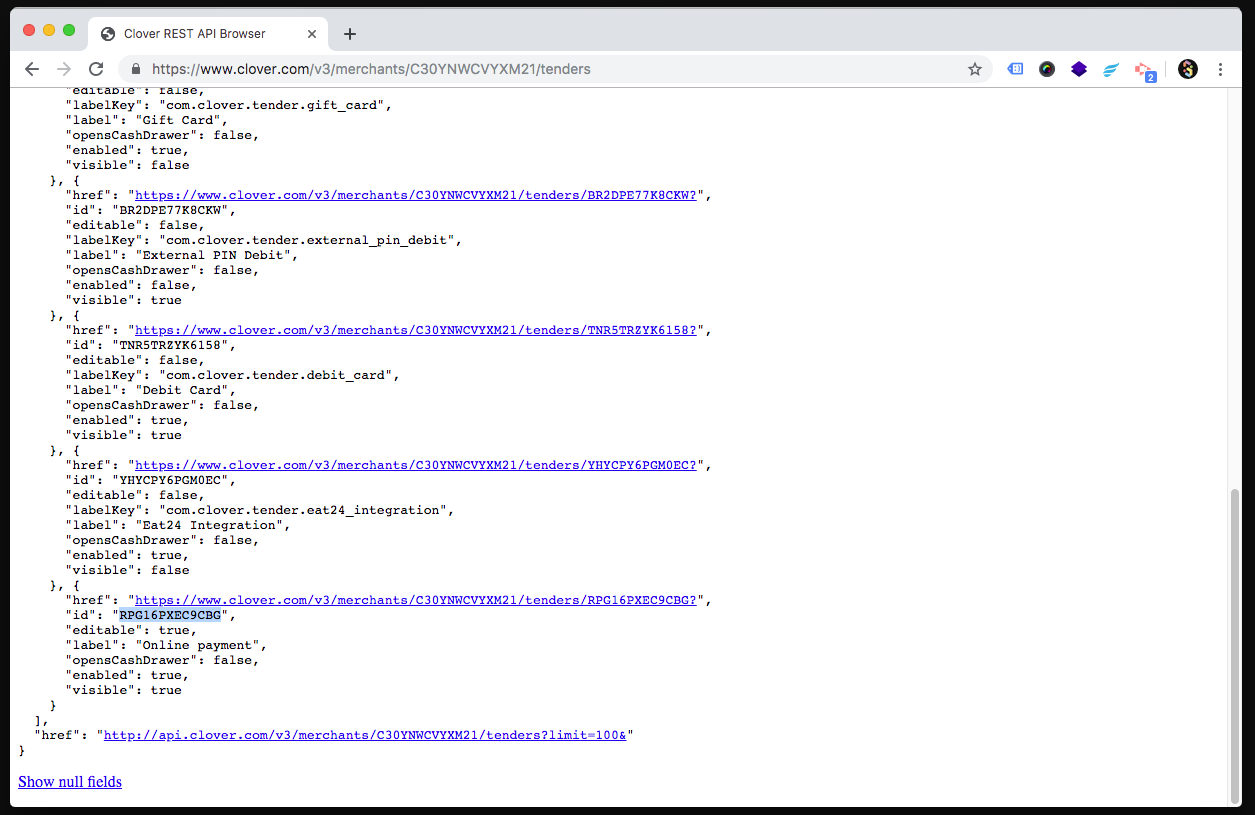
Once the new tender type has been added to your account you can locate the Tender ID by logging into your Clover Web Portal, and entering the following URL in your browser. Replace {my-account} with the merchant number for your Clover account.
https://www.clover.com/v3/merchants/{my-account}/tenders
Once the page load the Tender ID should appear above the name of your new tender type. See example:
https://www.kosmoscentral.com/imgs/tooltips/Clover-Tender-ID.png
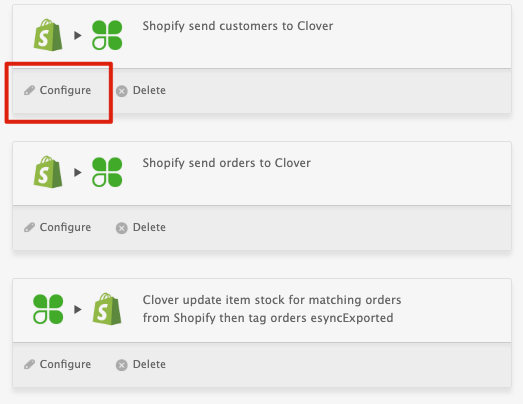
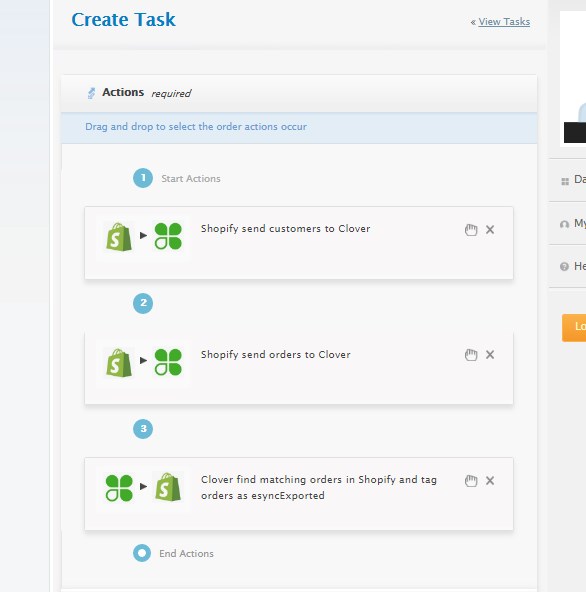
Next Actions must be adding in sequence into your TASK.
-
Shopify Send Customers to Clover
If the customer does not exist, eSync will create the Shopify customer in your POS. The order will not create without the customer First being added to the POS.
-
Shopify Send Orders to Clover
This will generate the Shopify order inside your Clover POS.
-
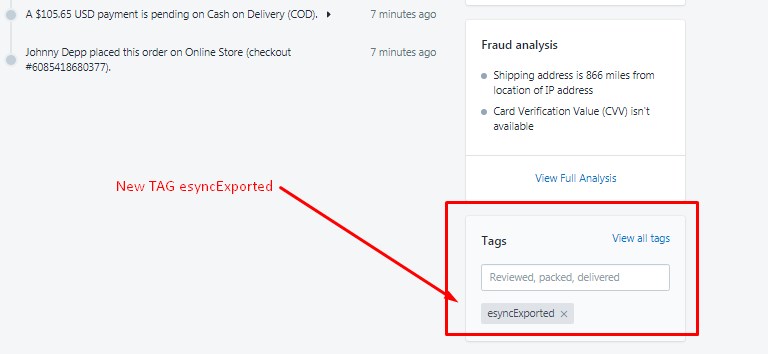
Clover find matching orders in Shopify and tag order as esyncExported This tag for Shopify
The tag is needed to update Shopify and to avoid sending the order back to Clover and creating duplicate orders in your POS.
See Example with all 3 Actions in the TASK
- Now hit SAVE on your TASK and hit RUN to test.
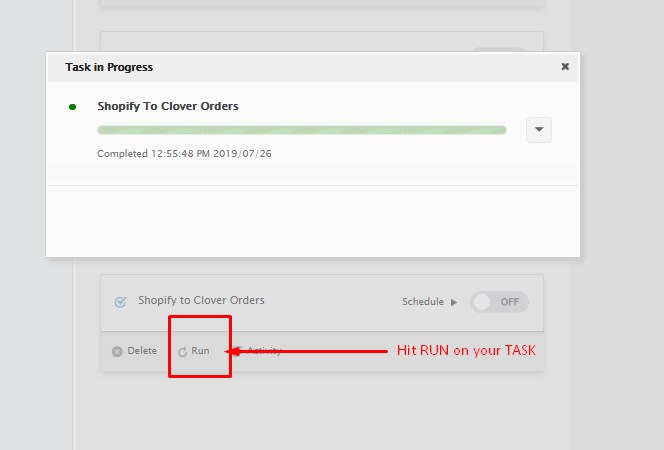
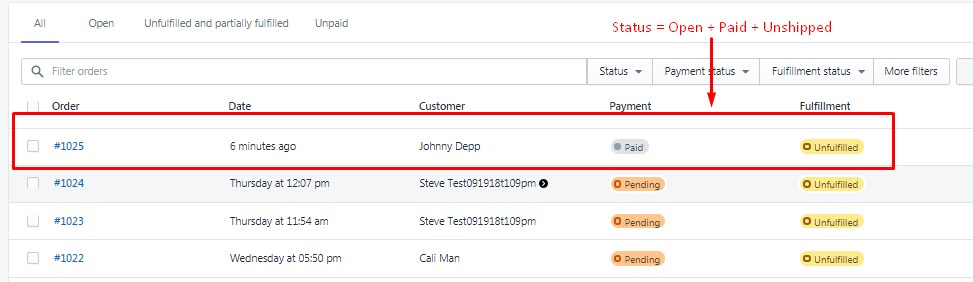
Open + Paid + Unshipped Orders (based on configuration) will be downloaded
Locate the Shopify order in the Clover POS with Shopify Order ID
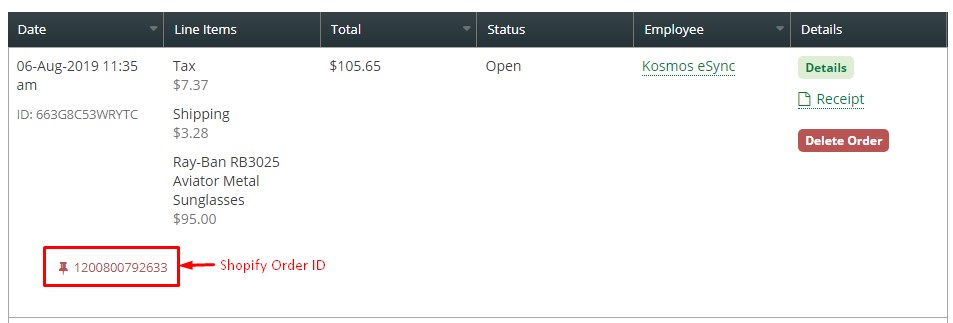
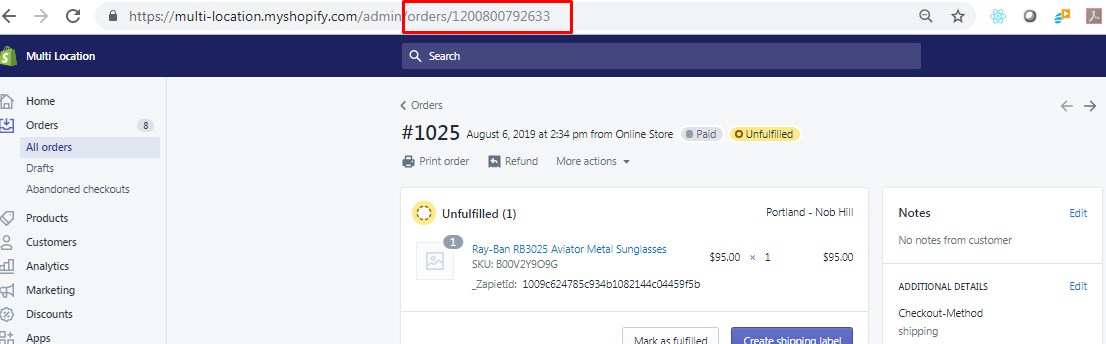
To prevent duplicates and the order from downloading again into the POS the TAG must be updated.
Now Locate the TAG ‘esyncExported’ for your Shopify order.
Note two way inventory sync requires orders sync and item stock update based on Shopify orders created in Clover.
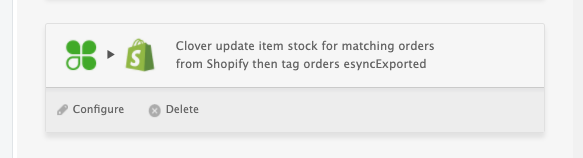
Action name: Clover update item stock for matching orders from Shopify then tag orders esyncExported. Please contact us in Support if this Action isn’t visible and we can activate it for you.
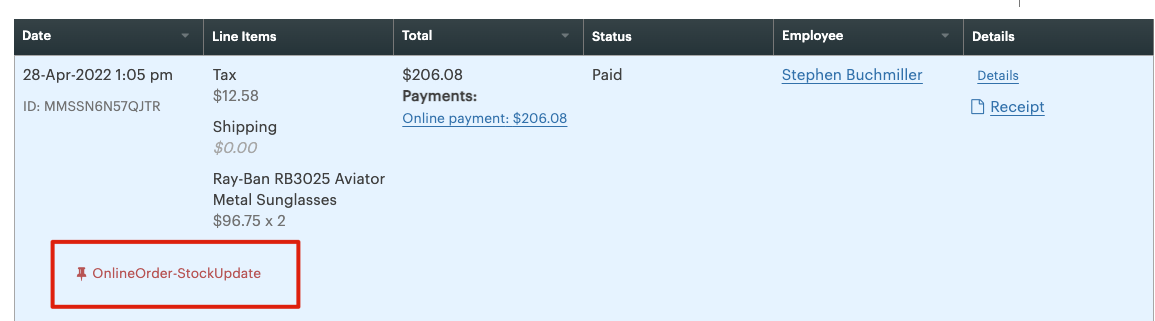
Order Notification - Online Order: StockUpdate
Need to PRINT the order?
All orders are assigned to the** DEFAULT Printer** at this time.
Not with the Clover POS system, you cannot delete or void out orders. You can only refund the transaction.
Try the Clover SmartPrint plug-in
If you have further questions, please post a ticket in our Help Desk and submit the full Activity Log located right next to your Task RUN button with the ticket.
If you’d like to purchase support hours support package, you can do so here.